Introduction
The Pulsar RöK vaporizer is a popular choice among cannabis enthusiasts who want a high-quality, portable device for enjoying their favorite herbs. However, even the best vaporizers require maintenance from time to time to keep them performing at their best. One crucial component of the RöK vaporizer is the air path tube, which helps to deliver flavorful, smooth hits. Over time, the air path tube can become clogged with residue or damaged from use, leading to reduced performance. Fortunately, replacing the air path tube is a simple and affordable way to keep your RöK vaporizer in top shape.
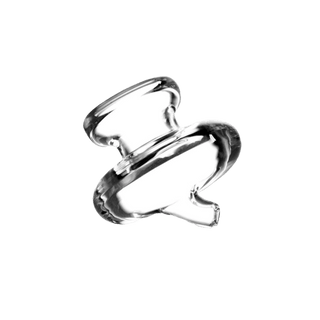
In this guide, we'll take you step-by-step through the process of replacing your Pulsar RöK Air Path Tube with this 2pc set. We'll cover everything from the tools you'll need to the proper installation technique. So, let's get started!
Tools You'll Need
Before you begin the replacement process, you'll need to gather a few tools to ensure a smooth installation. Here's what you'll need:
- Pulsar RöK Air Path Tube Replacement - 2pc set
- Small flathead screwdriver
- Cleaning brush
- Isopropyl alcohol
- Paper towels
Step-by-Step Guide to Replacing Your Pulsar RöK Air Path Tube
Now that you have your tools ready, it's time to get started with the replacement process. Follow these steps to replace your Pulsar RöK Air Path Tube:
Step 1: Turn off and disassemble the RöK vaporizer
Before you begin, make sure your RöK vaporizer is turned off and has cooled down. Then, remove the mouthpiece and the battery from the device.
Step 2: Remove the old air path tube
Using a small flathead screwdriver, gently pry the old air path tube out of the vaporizer. Be careful not to damage any other components in the process.
Step 3: Clean the vaporizer
Once you've removed the old air path tube, use a cleaning brush and isopropyl alcohol to thoroughly clean the inside of the vaporizer. This will help to remove any residue or buildup that may have accumulated.
Step 4: Install the new air path tube
Take the new air path tube from the Pulsar RöK Air Path Tube Replacement - 2pc set and carefully insert it into the vaporizer. Make sure it's securely in place and not loose.
Step 5: Reassemble the vaporizer
Once you've installed the new air path tube, it's time to reassemble your RöK vaporizer. Insert the battery and the mouthpiece back into the device.
Step 6: Test the vaporizer
Now that you've replaced the air path tube, it's time to test your RöK vaporizer. Turn it on and take a few draws to make sure everything is working correctly. You should notice improved performance and better flavor.
FAQs
Q: How often should I replace the air path tube in my Pulsar RöK vaporizer?
A: It's recommended that you replace the air path tube in your Pulsar RöK vaporizer every few months, depending on how frequently you use it. If you notice reduced performance or flavor, it may be time to replace the air path tube.
Q: Can I clean the air path tube instead of replacing it?
A: While you can clean the air path tube, over time it may become too clogged or damaged to be effectively cleaned. It's best to replace the air path tube when you notice reduced performance or flavor.
Q: Is it difficult to replace the air path tube in my Pulsar RöK vaporizer?
A: No, replacing the air path tube in your Pulsar RöK vaporizer is a simple process that can be done in just a few minutes with the right tools.
Conclusion
Maintaining your Pulsar RöK vaporizer is essential for ensuring the best performance and flavor. If you've noticed reduced performance or flavor, it may be time to replace the air path tube. With this 2pc set from Pulsar, replacing the air path tube is easy and affordable. By following the step-by-step guide in this article, you'll have your Pulsar RöK vaporizer back to performing like new in no time. Don't let a clogged or damaged air path tube ruin your vaping experience – replace it today!


